アプリ実行前に...。 Before running the application ....
このアプリは以下の別部品およびソースのインストールが必要です。順番に沿って部品の調達およびソフトのインストールを行ってください。
まずM5Stack、M5Stack用電池モジュール、LEPTON3 or 3.5、LEPTONブレイクアウトボードを手に入れてください。 以下必要部品の入手先とLEPTON画像再現までの手順です。
また、LEPTON3.0と3.5は自動判別します。
This application requires installation of the following separate parts and source. Please procure parts and install software according to the order.
First, get the M5Stack,M5Stack battry module ,development board,LEPTON 3 or 3.5, LEPTON breakout board.Below is the procedure from where to obtain the required parts to LEPTON image reproduction.LEPTON3.0 and 3.5 are automatically identified.
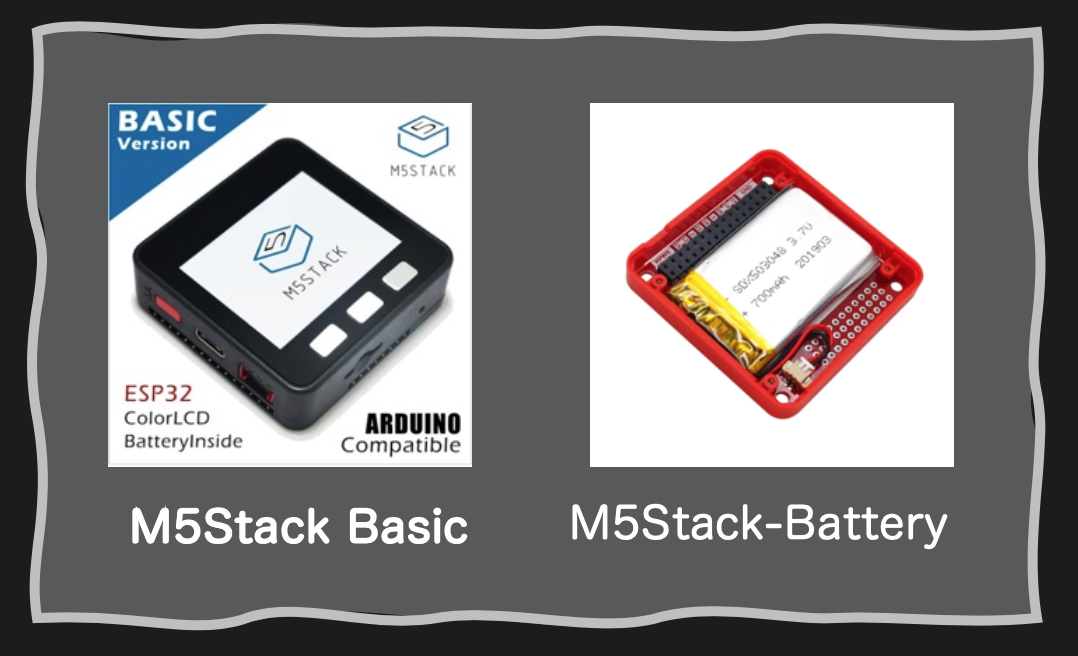
1. M5StackとM5Stack電池モジュールを用意してください。Prepare the M5Stack and M5Stack battry module.

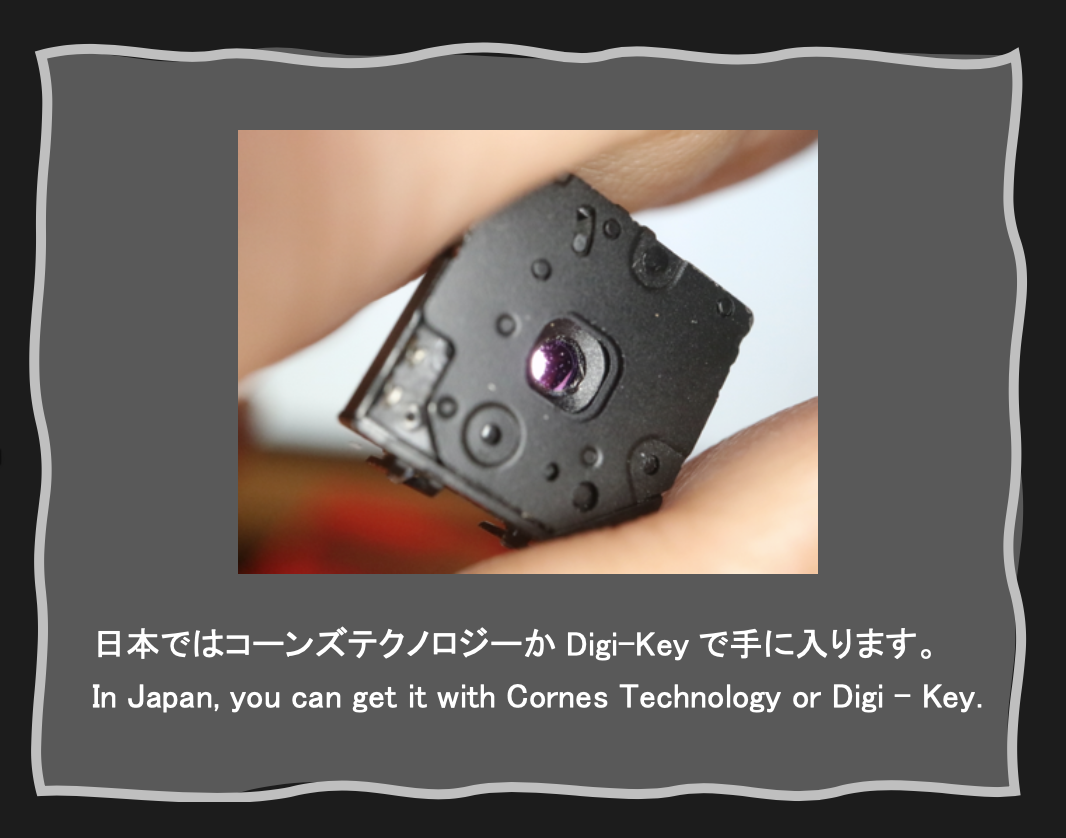
2. LEPTON3.0又は3.5を用意してください。Please prepare LEPTON3.0 or 3.5

LEPTONセンサー自体は完全防水で、衝撃にもかなり強いため悪条件にびくともしませんが、取り外し可能なシャッター部品は壊れやすい欠点があります。取り扱いには十分に注意してください。LEPTONは定期的にシャッターを閉じて画像のキャリブレーションを行っていますが、シャッターが壊れると残像が残るなど、画像に障害が出て来ます。今の所シャッターの交換部品は販売していない様なので、取り扱いには十分注意が必要です。
The LEPTON sensor itself is completely waterproof, and it is quite strong for impact, so it does not bother with adverse conditions, but detachable shutter parts have a breakable disadvantage. Please handle with care. LEPTON regularly closes the shutter and calibrates the image, but if the shutter breaks, afterimages will remain, such as image failure will come out. Currently it seems that we do not sell replacement parts for the shutter, so careful handling is necessary.
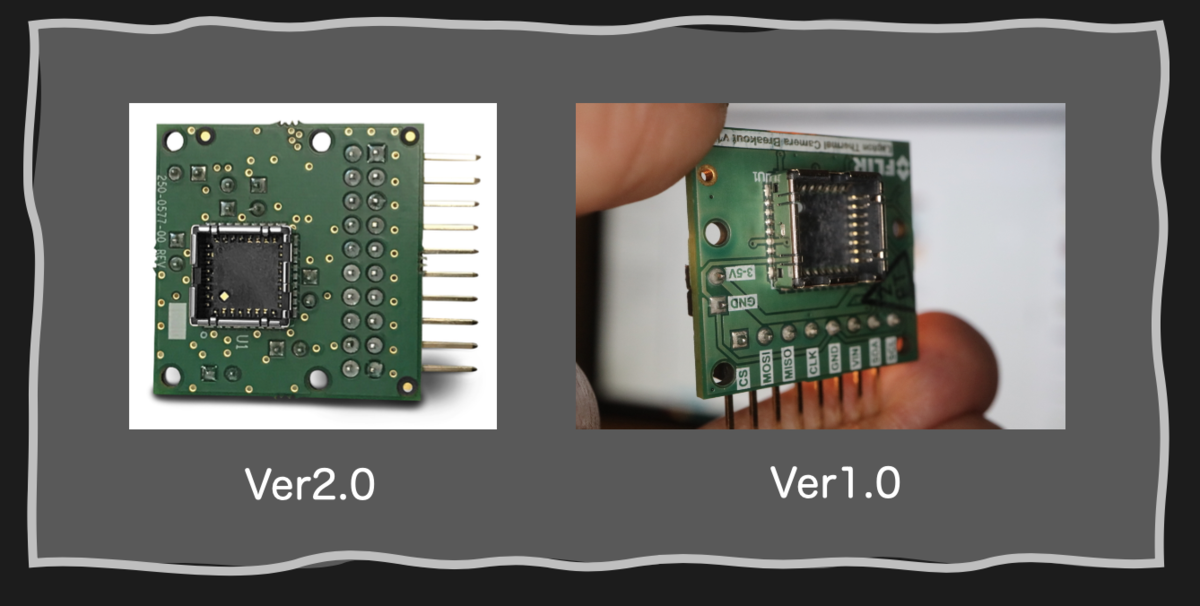
3. BREAKOUT BOARDが必要です。 BREAKOUT BOARD is required.

Ver1.0 は製造中止ですが ver2.0 はFLIR Lepton Breakout Board v2.0 | FLIR Systemsで手に入ります
In Japan, you can get it with Cornes Technology or Digi - Key.
4. Arduino IDEをインストールします Install Arduino IDE
M5Stack - A series of modular stackable development devices
自分のコンピューターに合わせてインストールして下さい。
Please install according to your computer.
5. OSCライブラリをインストールします。 Install the OSC library.
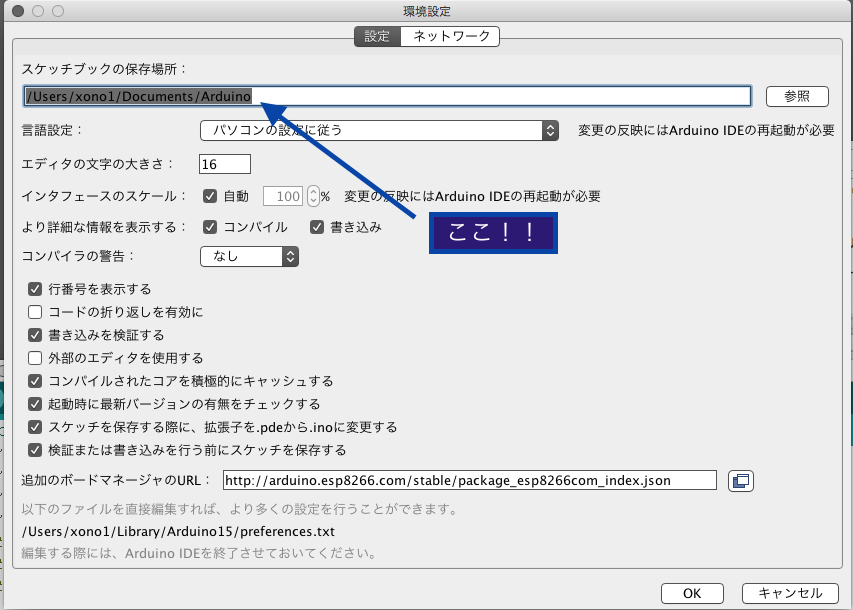
Arduino IDEの Arduino—>Preferences.. を選択して一番上の スケッチブックの保存場所を確認します。
Select Arduino-> Preferences .. in the Arduino IDE and check the storage location of the top sketchbook.

この中にlibraries フォルダがあるかどうか確認します
Make sure there is a libraries folder in this.
無かったらlibrariesフォルダを作成します。以下のURLを開いて
https://github.com/sandeepmistry/esp8266-OSC
ESP8266のOSCライブラリをダウンロード解凍してlibrariesフォルダに移動させます。
一度Arduino IDEを終了させ、再起動後 スケッチ-->ライブラリをインクルードを選択して 「OSC 」が入っているかどうか確認。
If you do not have it, create a libraries folder. Open the following URL
https://github.com/sandeepmistry/esp8266-OSC
Unzip the OSC library of ESP 8266 and move it to the libraries folder.
Exit the Arduino IDE once, after restarting, select Sketch -> Include Library to check if "OSC" is included.
6. OSCライブラリの一部を変更します。Change part of the OSC library.
OSCdata.h
以下94~96行目をコメントアウトまたは削除します。
Comment out or delete lines 94 to 96 below.

OSCData.cpp
以下31~38行目をコメントアウト又は削除します
Comment out or delete lines 31 to 38 below.

7. iPhoneを設定します。 Configure iPhone.
iPhone を普通に初期設定するとssidは日本語になります。エラーが起きる可能性がありますので半角英字に修正してください。
設定-->一般-->情報-->名前-->現在のiPhone名称>を選択 で名称を変更します。名称を変更してもiPhone自体の挙動に影響はありません。
When initializing iPhone as usual, ssid becomes Japanese. Please correct it to half-width alphabetical as it may cause an error.
Choose Settings -> General -> Information -> Name -> Current iPhone Name> to change the name. Changing the name does not affect the behavior of the iPhone itself.
8. M5Stack Arduino ソースをダウンロードします。Download the M5Stack Arduino source.
上記URLからダウンロードしてください。(LEPTON3.0と3.5はアプリが自動判別します)Arduino IDEを開いて、ダウンロードしたファイルをダブルクリック。フォルダの中に入れますか?と聞かれるので、YESを選択。OSCやSPIの安定化、UDPパケット紛失問題の解消、ESP特有のWDTリセットの解決方法をコメントしておきました。
Please download from the above URL.Open Arduino IDE and double click on the file you downloaded now. Can you put it in the folder? As you are asked, choose YES. We commented on the stabilization of OSC and SPI, the elimination of UDP packet loss problem, and the solution method of WSP reset specific to ESP.
9. 今回のiPhoneアプリをダウンロードします。Download this iPhone application.

W&T又はkansaiで検索。Themal Cam3Xを探します。申し訳有りませんが有料アプリです。
Search by W&T or kansai. Look for Themal Cam 3X according. Sorry, this is a paid app.
10. 今回のソースを開いて一部を修正します。Open this source and fix some.
修正が必要な部分は、以下の2箇所です。
58,59行目付近
#define SSID_X “ABiPhone” //iPhone
#define PASS_X "11111111" //iPhone
ABiPhoneにiPhoneの名称、11111111 に 設定-->モバイルデータ通信-->Wi-Fiのパスワード を調べて パスワードを入力します。
GPSをONにすると、周期的に一瞬ピカッと光ります。確実にパケットを紛失してるのですが画像にはさほど影響がないことがわかると思います。BlueToothをONにするとさすがにたくさん点滅してフレームレートが多少落ちます。
The parts that need to be modified are the following three places.
Near lines 34 and 35
#define SSID_X “ABiPhone” //iPhone
#define PASS_X "11111111" //iPhone
Set the name of iPhone to ABiPhone, set to 11111111 -> Mobile data communication -> Enter the password by checking the Wi - Fi password.
When GPS is turned on, it glows shimmerly periodically. I think that you can see that there is not much effect on the picture although it surely loses the packet. When BlueTooth is turned on, it glows a lot and the frame rate drops.
11. M5StackとLEPTON BREAKOUT BOARD を接続します。Connect M5Stack and LEPTON BREAKOUT BOARD.


12. WROOM02(ESP8266)ボードにプログラムを転送します。Transfer the program to WROOM02 (ESP8266) board.
以上設定が終わったらコンパイル、転送します。たまにエラーが出る場合がありますが、その場合は再度転送してください。(USBを認識していない場合が多い)
When compilation and transfer are done, it completes. Although occasionally an error may appear, please transfer again in that case. (USB is not recognized in many cases)
13. いよいよサーモグラフィー開始 The thermography finally starts !!
iPhoneX、11Proでの動作確認をしています。iPadでも動くと思いますが、両者ともCPUはA9以上が必要です。iPhone 11 Pro MAX、Xs、Xs Pro、XR、8、8Plus、他のiPadに関してはシュミレーターで動作を確認・調整しています。
インストール作業から1回目の動作確認までは、簡単とは言えませんが、Arduinoに慣れている皆さんにとっては全く問題のない過程です。セキュリティーを保ったまま、2回目以降は3ステップ(LEPTON側スイッチオン-->インターネット共有-->iPhoneアプリ起動)で動いてしまいます。煩わしいWiFi選択やIP、パスワード入力などは全く必要ありません。また、テザリングを使っていても外部とは通信しないので、Thermal Cam3動作に関する通信料金は発生しません。
I am checking the operation with X,11Pro. I think that it will work on general iPad, but both require A9 or more CPU. For iPhone Xs,Xs Pro,XR,8, 8 Plus, and other iPads, the operation is checked and adjusted with a simulator.
It is not easy from installation to first confirmation of operation, but for everyone who is accustomed to Arduino it is a completely problem free process. While keeping security, it moves with 3 steps (LEPTON side switch ON -> Internet share -> iPhone application launch) after the second time. No troublesome WiFi selection, IP, password entry etc are required at all. Also, even if you use tethering, you will not communicate with the outside, so there will be no communication fee for Thermal Cam 3 operation.
15. M5Stackでの動作について
- 電源ボードで電池容量を大きくしていますが、M5Stackが起動しない場合は再充電を行って下さい。
- iPhoneとのテザリング接続が完了しないとM5Stack側の赤外線画像が表示されません
- M5Stack側のカラーレンジには対応していません(ダイナミックレンジは可能)
- テザリング到達距離はESP8266に比べ大幅に短くなります(最大で35m程度)
- M5Stack側での画像のカラー変更は一番左側のボタンを押します。
- The battery capacity is increased with the power board, but if M5Stack does not start, recharge it.
- If the tethering connection with the iPhone is not completed, the infrared image on the M5Stack side will not be displayed
- The color range on the M5Stack side is not supported (dynamic range is possible)
- Tethering reach is significantly shorter than ESP8266 (up to about 35m)
- To change the color of the image on the M5Stack side, press the leftmost button.